· blog · 4 min read
The easiest way to add comments on your blog is giscus!
In this article I will talk on how to add comments to an Astro site using giscus

Hello There! TheZal here and today I’m gonna show you how to add a comment section inside your Astro Blog easily!

The easiest way to add a comment section to your Astro blog is by using giscus. Let’s break down the steps and make it works!
What is giscus?
giscus it’s an open source comment system that let visitors leave comments and reactions on your website using GitHub Discussion. As they say on their website, the team of giscus draws inspiration from Utterances.
But what is the difference between them? There is mainly one difference: while Utterances uses the Github Issue system, giscus uses the GitHub Discussion system.
The workflow of giscus is really easy and efficient, when giscus is loaded, it utilizes the GitHub Discussions search API to locate the relevant Discussion linked to the page, utilizing a specified mapping such as the URL, pathname, or page title. In case a corresponding discussion is not found, the giscus bot takes the initiative to create a new discussion when a comment or reaction is left for the first time by any individual.
To leave a comment, visitors are required to grant authorization to the giscus app, allowing it to post on their behalf through the GitHub OAuth flow. Alternatively, visitors have the option to comment directly on the GitHub Discussion itself. The moderation of comments can be conducted on GitHub, providing control over the discussion.
Prepare your repository
Without any further let’s add giscus to your Astro site!
The first thing to do is to set up the repository where your site is hosted by installing the giscus app and enabling the feature of the GitHub discussion on your repository. Remember, to use giscus the repository must be public.
The installation is fast and easy, just visit the giscus app site and install it. Easy peasy.
To enable the discussion feature instead, you must go inside the settings of your repository and enable the Discussion feature inside the Features section.

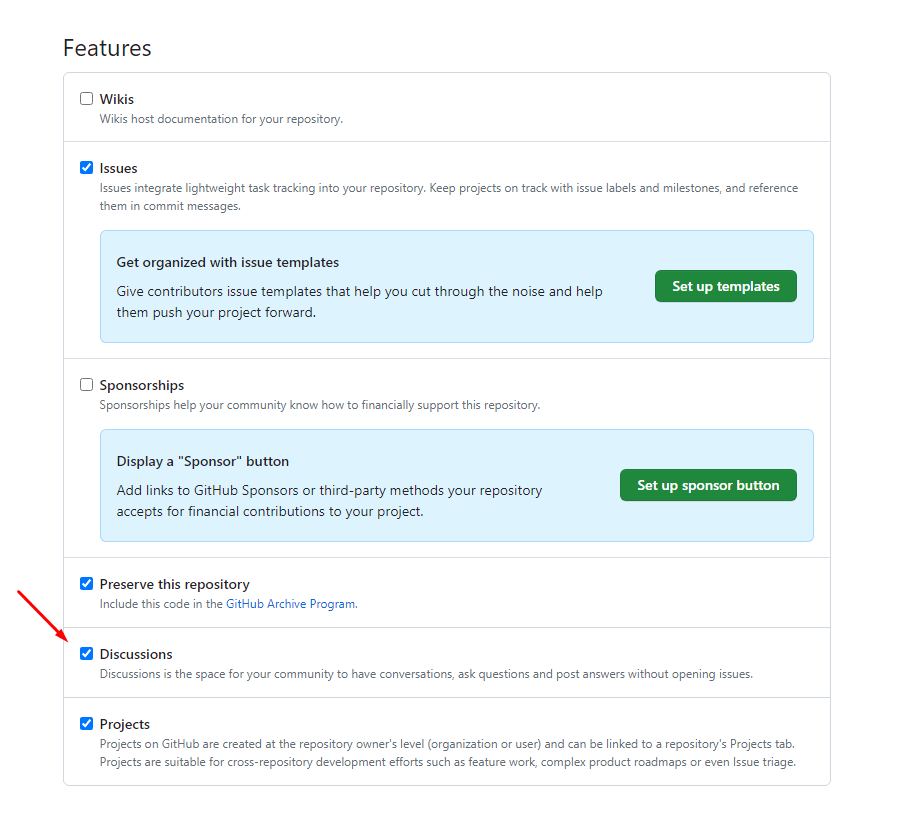
The first step is over!
Generate your script
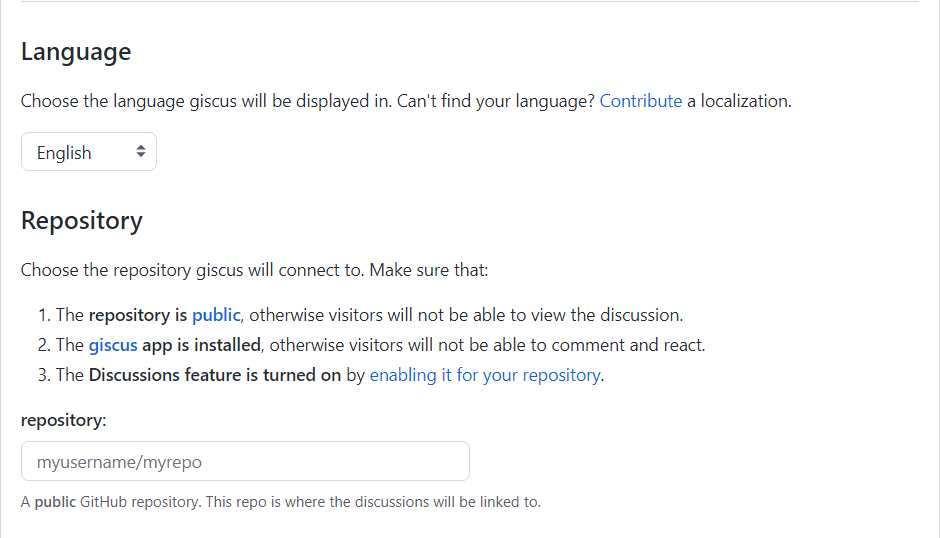
The second step is to create your script and giscus will guide you.
Just visit giscus.app and fill in the fields in the configuration section.
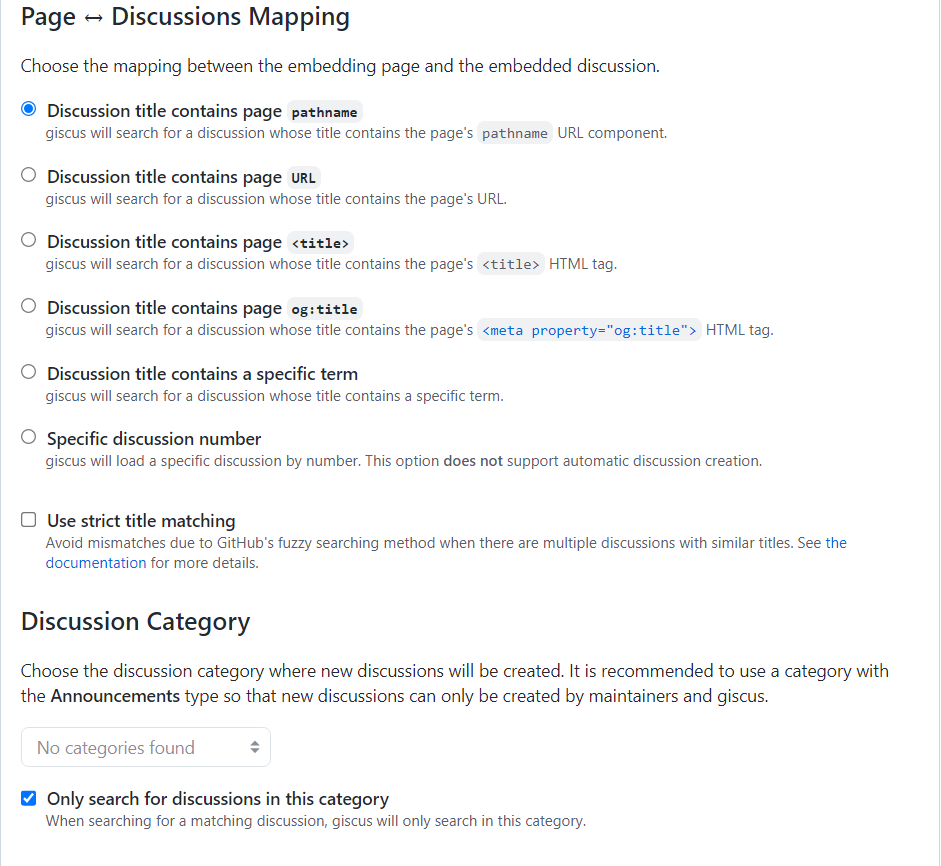
Select the mapping you prefer for your discussion and the category. Using Announcements only giscus and the maintainers will be able to create new discussions.
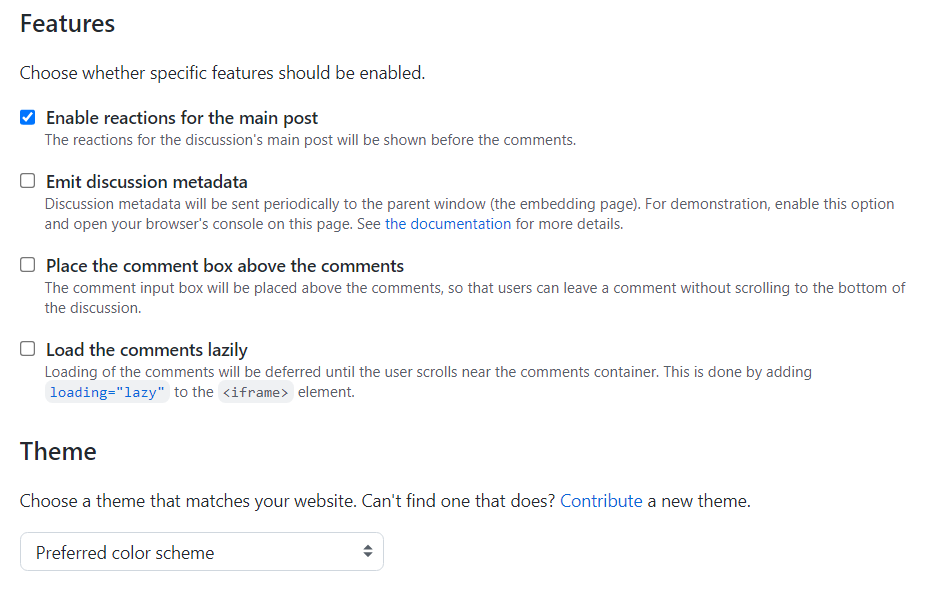
Choose the features that fit most on your case and the theme you will use for your comment section.
And if you want a dynamic theme… check the last step!
Under the Enable giscus section you will find the script generated by the site. Adding a container with the class giscus the comment section will appear inside this container. In my case, the script is:
<!-- Container -->
<section class="giscus mx-auto mt-10 max-w-screen-md">
  <!-- giscus Script -->
  <script
    src="https://giscus.app/client.js"
    data-repo="TheZalRevolt/TheZalDev_Blog"
    data-repo-id="R_kgDOJT_cVg"
    data-category="Announcements"
    data-category-id="DIC_kwDOJT_cVs4CWqBv"
    data-mapping="pathname"
    data-strict="0"
    data-reactions-enabled="1"
    data-emit-metadata="0"
    data-input-position="bottom"
    data-theme="dark"
    data-lang="en"
    crossorigin="anonymous"
    async
  ></script>
</section>
Let’s Code!
Ok, you got the code but… where do you have to put it?
In my case, using an Astro Template for this blog, I decided to create a component with the code generated inside. I called it CommentSection.astro and it looks like this:
<!-- Container -->
<section class="giscus mx-auto mt-10 max-w-screen-md">
  <!-- giscus Script -->
  <script
    src="https://giscus.app/client.js"
    data-repo="TheZalRevolt/TheZalDev_Blog"
    data-repo-id="R_kgDOJT_cVg"
    data-category="Announcements"
    data-category-id="DIC_kwDOJT_cVs4CWqBv"
    data-mapping="pathname"
    data-strict="0"
    data-reactions-enabled="1"
    data-emit-metadata="0"
    data-input-position="bottom"
    data-theme="dark"
    data-lang="en"
    crossorigin="anonymous"
    async
  ></script>
</section>
Yeah, the same code of the step up here.
After the creation of the component I imported it inside the component that manages the layout of the article, which in my case is SinglePost.astro, and used it where I wanted to.
---
import CommentSection from '~/components/blog/CommentSection.astro';
---

<section>
  <article>
    ...
    <div class="mx-auto px-6 sm:px-6 max-w-3xl mt-8 flex justify-between flex-col sm:flex-row">
      <PostTags tags="{post.tags}" class="mr-5" />
      <SocialShare
        url="{url}"
        text="{post.title}"
        class="mt-5 sm:mt-1 align-middle text-gray-500 dark:text-slate-600"
      />
    </div>
    <CommentSection />
  </article>
</section>
From now on, every article will have its comments section!
A small adjustment
But what if your site got a toggle that allows you to switch between dark and light themes?
Right now you have a static theme for your comment section determined by the value of the data-theme row of the script, but it is possible to change it dynamically by sending a message event from the parent page to giscus!
First of all, you have to find the handle of the toggle (thanks Balastrong) and then add the code to make it send a message to giscus.
I used the following code:
const iframe = document.querySelector('iframe.giscus-frame'); //get the iframe of giscus
if (!iframe) return;
iframe.contentWindow.postMessage({ giscus: { setConfig: { theme: localStorage.theme } } }, 'https://giscus.app'); //send a message with the theme to apply
And that’s it! Let the comments begin!
If you found this useful feel free to leave a comment or to reach me on Twitter, GitHub, or mail and share it with your dev friends!